

Have you ever tasted the rich, creamy goodness of homemade cow ghee? If not, you’re in for a treat! While ghee has been a staple in kitchens across India for centuries, making it at home might feel like a daunting task for some. But what if I told you that creating this golden, fragrant delight in your own kitchen could be easier than you think? In this article, we’ll walk you through the simplest and most foolproof recipe to make homemade cow ghee—no fancy equipment or years of culinary expertise required. From sourcing the best quality milk to achieving that perfect melt-in-your-mouth texture, you’ll have all the tips and tricks you need to elevate your cooking with this all-natural, nutrient-packed superfood. Ready to give it a go? Let’s dive in!
Cow ghee, also known as clarified butter, has been a cornerstone of Indian cuisine and holistic health practices for centuries. Known for its rich, nutty flavor and health-boosting properties, ghee is making a comeback in kitchens around the world. While store-bought ghee is readily available, there’s something incredibly rewarding about making your own at home. The process not only brings you closer to this nutrient-dense superfood but also allows you to control every step, ensuring that your ghee is pure, fresh, and free from additives. So, let’s dive into why homemade cow ghee is worth the effort and how you can easily create it yourself.
Table of Contents
Why Homemade Cow Ghee?

- Health Benefits of Homemade Ghee
Homemade cow ghee is more than just a cooking fat; it’s a nutritional powerhouse. Unlike processed oils or margarine, which can be laden with preservatives, homemade ghee is packed with healthy fats and essential nutrients that offer a wide range of health benefits. It’s rich in butyrate, a short-chain fatty acid that promotes gut health, improves digestion, and supports the immune system. Ghee is also loaded with vitamins A, D, E, and K, which are crucial for maintaining healthy bones, skin, and vision.
Additionally, homemade ghee is known to have anti-inflammatory properties and can be beneficial for skin health. It’s used in many traditional beauty routines, offering deep nourishment for the skin and hair. And because homemade ghee is free from artificial additives, preservatives, and coloring agents, you can be confident that you’re consuming a pure, natural product that’s good for your body.
- The Difference Between Store-Bought and Homemade Ghee
While store-bought ghee might be convenient, it often lacks the flavor and quality of homemade ghee. Homemade ghee has a richer, more complex taste due to the careful process of slow simmering, which allows the milk solids to caramelize and deepen in flavor. You can also adjust the aroma by customizing the milk or the cooking time.
Another key difference is the purity. Many commercial ghee brands undergo refining processes that involve hydrogenation or the addition of chemicals to extend shelf life. Homemade ghee, on the other hand, is free from such processes, offering you a product that’s as natural as possible.
Ingredients You’ll Need
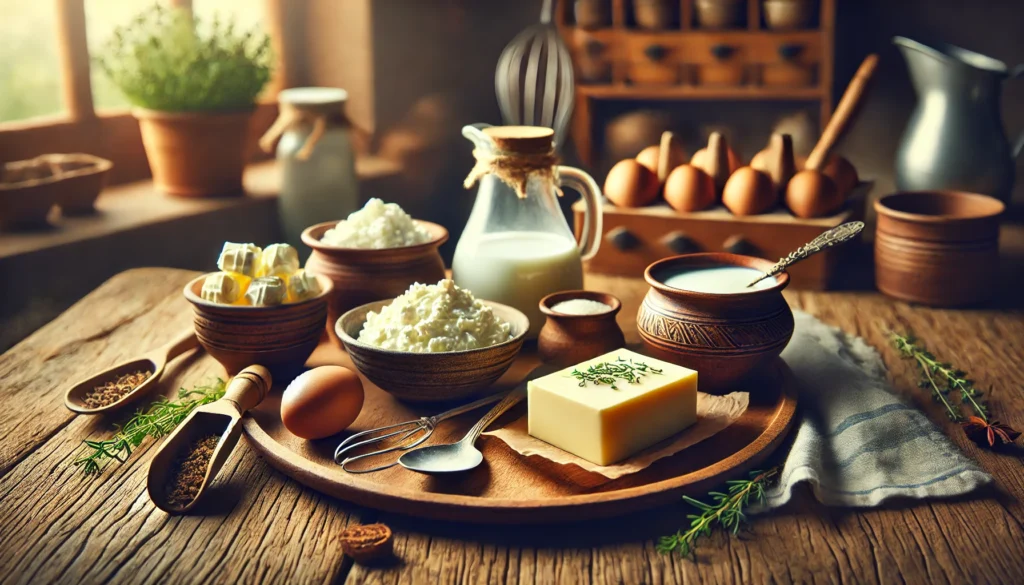
- Choosing the Right Milk
The foundation of good ghee lies in the quality of the milk. Cow’s milk is the traditional choice, as it has the right balance of fats and proteins for making ghee. When possible, opt for full-fat, organic, and hormone-free milk, as these provide the richest flavor and most nutrients. If you can source milk from a local farm or from cows that graze on grass, you’ll get the freshest milk and, consequently, the best ghee.
- Essential Equipment for Making Ghee
Making ghee requires just a few simple tools:
- A heavy-bottomed pot or pan: This helps in evenly heating the milk and curd without burning it.
- Cheesecloth or a fine mesh strainer: To strain out any impurities, milk solids, or curds after the ghee has clarified.
- A clean glass jar or container: For storing your homemade ghee. Glass containers work best for long-term storage, preserving the ghee’s flavor and quality.
The Simple Step-by-Step Recipe
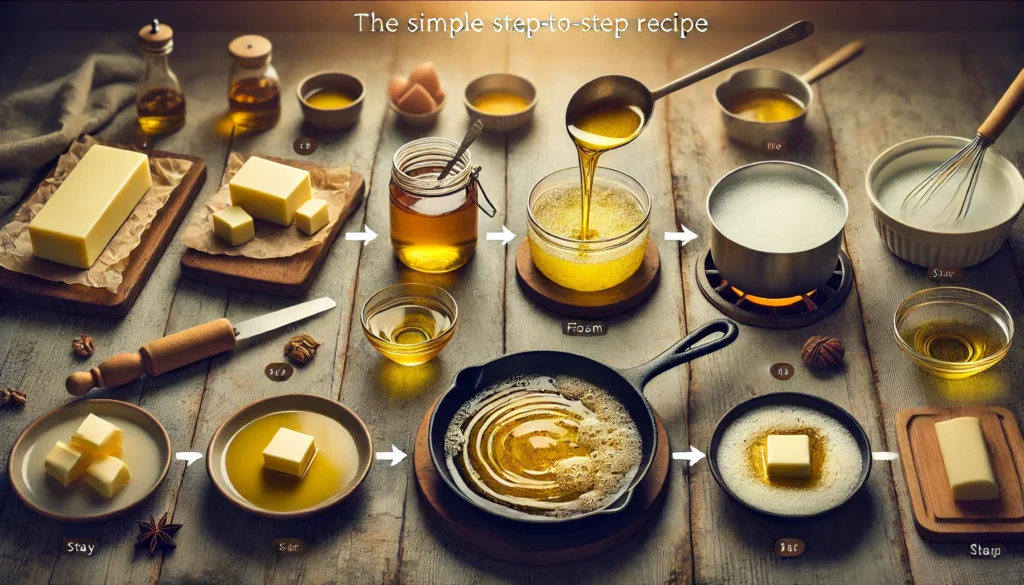
Now, let’s get into the fun part—making ghee! While the process requires a bit of patience, it’s straightforward and worth every minute.
- Step 1: Boil the Milk
Start by heating the milk in a large, heavy-bottomed pot on medium heat. Stir occasionally to prevent the milk from sticking to the bottom of the pot or burning. Watch for the right boiling point—when the milk begins to form a light foam and starts to gently bubble. This means the milk is ready to curdle.
- Step 2: Curdling the Milk
Once the milk has reached the boiling point, it’s time to add a coagulant. You can use lemon juice, curd, or even vinegar—just a tablespoon or two should do. Stir gently to mix in the coagulant, then cover the pot and let the milk sit undisturbed for about 30 minutes. You’ll notice the milk will begin to curdle, forming curds (solid parts) and whey (liquid).
- Step 3: Separating the Curd from the Whey
After the curds have formed, it’s time to strain the liquid (whey) from the curd. Pour the mixture through a fine mesh strainer or cheesecloth into another pot or bowl. You want to keep the curds well-drained but intact. The leftover whey can be discarded or used in smoothies, soups, or as a base for fermentation.
- Step 4: Cooking the Curd to Clarify
Now, you’ll cook the remaining curds over low heat. This is the crucial step where the ghee begins to form. As the curd cooks, the butterfat will begin to separate from the solids and the milk will start to turn golden and fragrant. You’ll notice a rich, nutty aroma filling your kitchen as the ghee cooks. Simmer for about 30 minutes, stirring occasionally, until the ghee turns a clear golden color.
- Step 5: Straining the Ghee
Once your ghee has reached the desired color and aroma, remove it from the heat and allow it to cool slightly. Use a cheesecloth or fine mesh strainer to filter out any remaining milk solids. What you’re left with is pure, clarified ghee, which you can store in an airtight container.
Tips for Perfect Homemade Ghee Every Time

Making ghee is an art, and like all great cooking, it requires some patience and attention to detail. Here are some tips to ensure you get the best results:
- Don’t Rush the Process: The key to perfect ghee is slow cooking. Rushing the simmering process could lead to burnt ghee or an incomplete separation of fats.
- Watch the Temperature: Keep the heat low and steady. If the heat is too high, the milk solids could burn, affecting the taste and quality of your ghee.
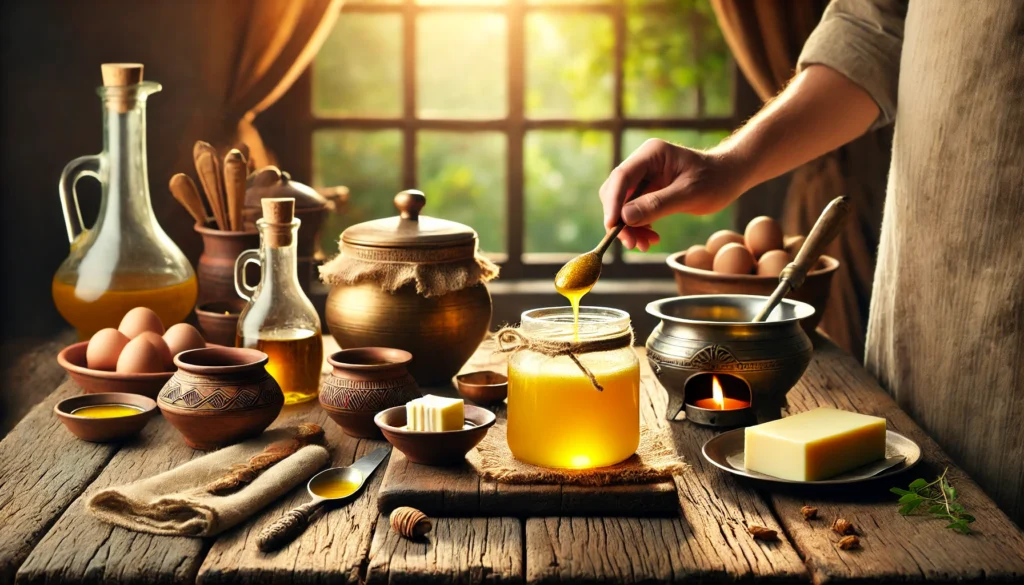
- Storage Tips for Freshness: Once made, ghee can be stored at room temperature for several weeks, provided it’s in a clean, airtight container. For longer shelf life, you can refrigerate it. Glass jars work best for storing ghee, as they preserve its flavor better than plastic containers.
How to Use Homemade Cow Ghee in Your Kitchen

Homemade cow ghee isn’t just for traditional Indian dishes—it can be used in a variety of ways in your everyday cooking.
- Cooking and Baking
Use ghee in place of butter or oils for sautéing, frying, or even baking. Ghee’s high smoke point makes it an excellent choice for high-heat cooking. It imparts a delicious, nutty flavor to anything you cook with it, from stir-fries to cookies.
- In Traditional Recipes
Ghee is the backbone of many traditional Indian dishes. Think dal, chapati, or vegetable curries. The addition of ghee transforms the taste and aroma of these dishes, giving them depth and richness. You can also stir a spoonful of ghee into your morning oatmeal or add it to a smoothie for a nourishing, energy-boosting treat.
- As a Beauty and Wellness Product
Ghee is also known for its moisturizing properties and is a common ingredient in Ayurvedic beauty treatments. You can use ghee to treat dry skin, promote hair growth, or even use it as a natural lip balm.
Embrace the Simplicity and Tradition of Homemade Cow Ghee
Making homemade cow ghee is a time-honored tradition that connects us to our roots and offers a variety of health benefits. The process is simple, and the rewards—both in terms of flavor and health—are well worth the effort. As you experiment with this recipe, take the time to enjoy the process and infuse your kitchen with love and care. Whether you’re cooking up a family favorite or trying something new, homemade ghee adds a rich, wholesome touch to any dish.
Embrace the simplicity and tradition of homemade cow ghee, and start enjoying the purest, most flavorful ghee in your kitchen today!
Frequently Asked Questions About Homemade Ghee
- How long will homemade ghee last?
Homemade ghee can last several weeks at room temperature and up to 6 months in the refrigerator. - Can I make ghee with skim milk?
Skim milk lacks the fat content required to make ghee. Whole milk or full-fat milk is essential for the best results. - What’s the difference between ghee and clarified butter?
Ghee is clarified butter, but it is cooked longer to allow the milk solids to caramelize and enhance the flavor. - Can I make flavored ghee?
Yes! You can infuse your ghee with garlic, herbs, or spices like turmeric or ginger to add unique flavors.
-
What is the difference between ghee and clarified butter?
Ghee and clarified butter are both made by melting butter and removing the milk solids, but the key difference lies in the cooking process. Ghee is cooked longer than clarified butter, allowing the milk solids to caramelize, which gives it a richer, nuttier flavor and a golden color. This additional step also enhances its shelf life, as ghee is essentially free of any moisture. Ghee also has a higher smoke point, making it ideal for high-heat cooking.
-
How long can homemade ghee be stored?
Homemade ghee can last for up to 4 to 6 weeks at room temperature, provided it is stored in a clean, airtight container and kept in a cool, dry place. For longer shelf life, you can refrigerate ghee, where it can last up to 6 months or more. Ghee does not require refrigeration, but it’s important to avoid contaminating it with moisture, as this can shorten its shelf life.
-
Can I make ghee using low-fat or skim milk?
While it is technically possible to make ghee from skim milk, it is not recommended. Full-fat milk is ideal for making ghee because it contains the necessary butterfat that is crucial for the process. Skim milk has very little fat content, which means you won’t get a good yield of ghee or the rich, creamy texture that comes with full-fat milk. For the best flavor and texture, always use whole or full-fat milk.
-
How do I know when ghee is ready?
You’ll know your ghee is ready when it turns a golden yellow color and becomes clear in consistency. It will also release a distinct, nutty aroma. The milk solids will separate and settle at the bottom of the pan, turning a light brown color, which is a sign that the ghee has been clarified properly. The process typically takes around 30 minutes to an hour, depending on the quantity of milk you’re working with.
-
Can I flavor my homemade ghee with spices or herbs?
Yes! One of the great things about making ghee at home is the ability to infuse it with your favorite flavors. You can easily add garlic, ginger, turmeric, curry leaves, or other herbs and spices to create flavored ghee. To do this, simply add the herbs or spices to the ghee after it has clarified and simmer for an additional 5-10 minutes to allow the flavors to infuse. Strain out the solids before storing it in a clean container.